Authentication with LDAP and Keystone
There is a distinction between authentication and authorisation:
- Authentication verifies who a user is.
- Authorisation deals with what a user is allowed to do.
Charmed Kubernetes can be configured to use Keystone and LDAP for authentication only or both authentication and authorisation.
Requirements
- This document assumes you have already installed Charmed Kubernetes.
- For LDAP authentication, this documentation assumes you already have a suitable LDAP server running.
- You will need to install the Keystone client. This can be done by running:
sudo snap install client-keystone-auth --edge
Install Keystone
Note: These instructions assume you are working with the Queens release of
OpenStack, the default supported version for Ubuntu 18.04 (Bionic)
Keystone should be deployed using Juju. This is easily achieved by using a bundle, which will deploy and relate, Keystone, the OpenStack dashboard and a suitable database. An example bundle is available for download.
Deploy the bundle with the following command:
juju deploy ./keystone.yaml
You should now add a relation for the kubernetes-master nodes to accept Keystone credentials:
juju add-relation keystone:identity-credentials kubernetes-master:keystone-credentials
You can check that the new applications have deployed and are running with:
juju status
The Keystone application will need to be accessible by kubectl running on your desktop.
You will also need to access the dashboard for the following steps. This can be achieved
with Juju by running:
juju expose keystone
juju expose openstack-dashboard
Note that, if security is a concern, this access can subsequently be reversed with:
juju unexpose keystone
juju unexpose openstack-dashboard
Using existing Keystone from an OpenStack model
If you have an existing Keystone application deployed as part of OpenStack in a separate Juju model, it is possible to re-use it for authenticating and authorising users in Kubernetes.
To do so, first deploy the openstack-integrator charm
juju deploy cs:~containers/openstack-integrator
Use ‘juju trust’ to grant openstack-integrator a permission to access the OpenStack model, or configure the credentials config parameter manually
juju trust openstack-integrator
Finally add a relation between kubernetes-master and openstack-integrator
juju add-relation kubernetes-master:keystone-credentials openstack-integrator:credentials
Fetch the Keystone script
When related to Keystone directly (or to the openstack-integrator:keystone-credentials interface),
the Kubernetes master application will generate a utility script.
This should be copied to the local client with:
juju scp kubernetes-master/0:kube-keystone.sh ~/kube-keystone.sh
The file will need to be edited to replace the value for OS_AUTH_URL, which should
point at the public address for Keystone, and the username if different. At this point the
file should be sourced:
source ~/kube-keystone.sh
The script should prompt you to enter an additional command to retrieve the token to
login to the OpenStack Dashboard. If this step fails, check that the details in the
kube-keystone.sh file are correct.
Access the OpenStack dashboard
You can determine the web address for the OpenStack dashboard by running:
juju status openstack-dashboard
Open the address in a web browser and log in with the token obtained previously.
https://<openstack_dashboard_ip>/horizon
If you just deployed Keystone and do not have any credentials set, it is useful
to note that Keystone creates the domain admin_domain by default and has a user
named admin with a randomly-generated password. You can find the admin password
with:
juju run --unit keystone/0 leader-get admin_passwd
Create the domain for Kubernetes
You should now create a new domain for Kubernetes.
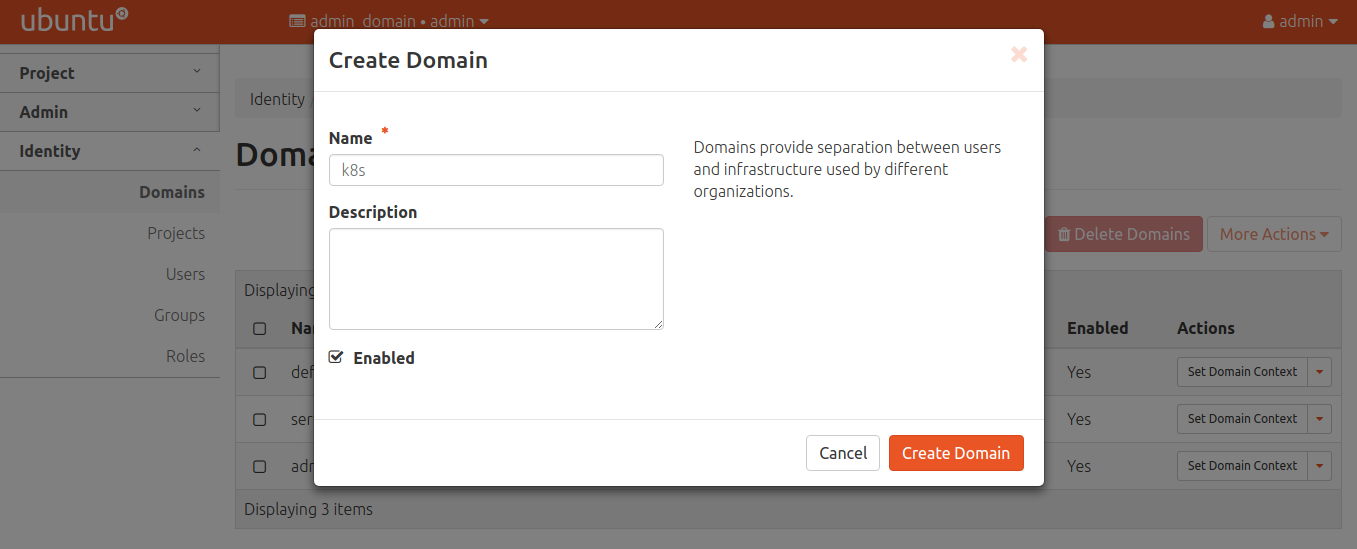
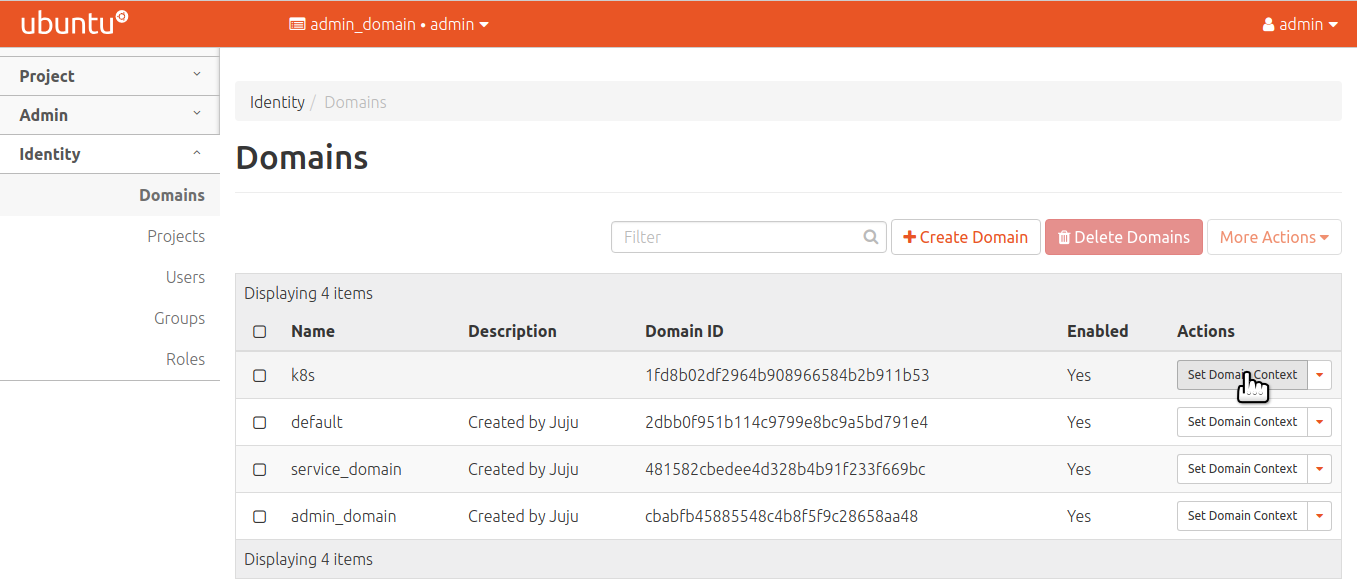
After creating, be sure to set the domain context so users and roles are added to the proper domain.
Create a role for Kubernetes
Create an appropriate role for Kubernetes:
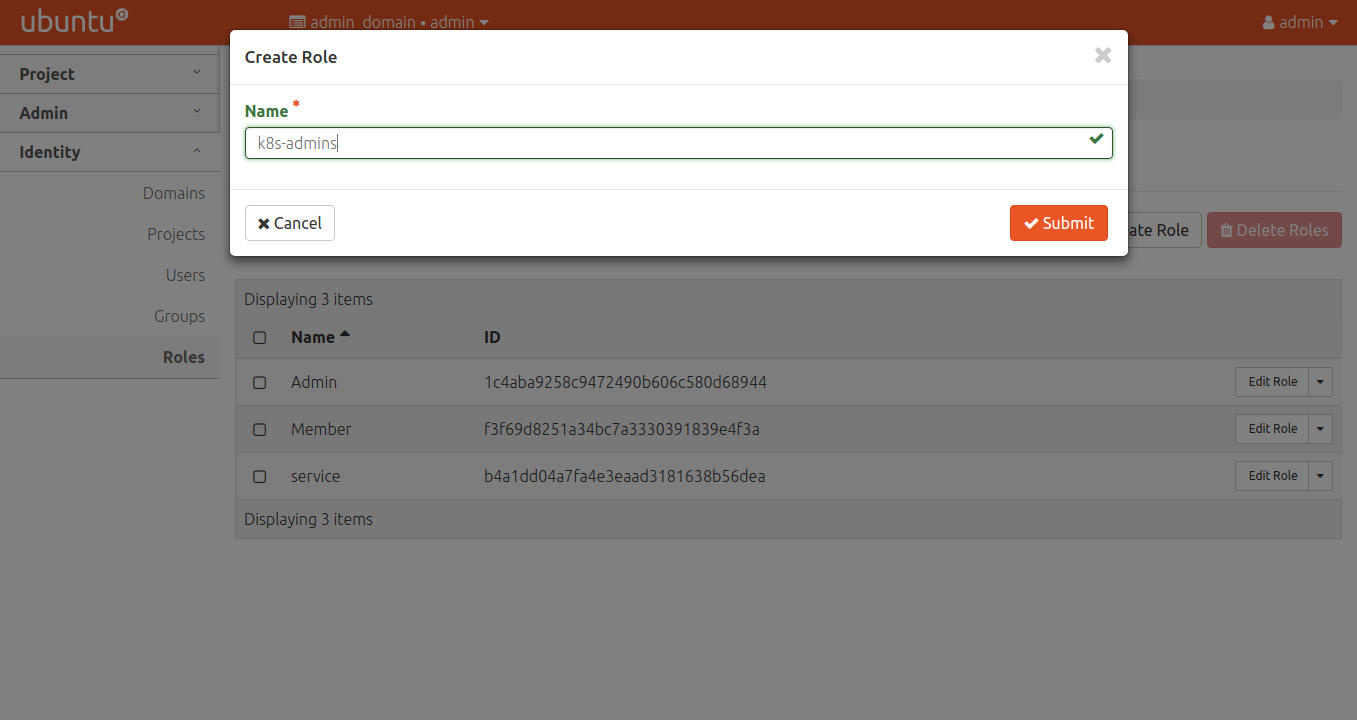
Repeat the process for k8s-viewers and k8s-users if desired. These values
match with the keystone-policy configuration option on the kubernetes-master
charm.
Create a project for Kubernetes
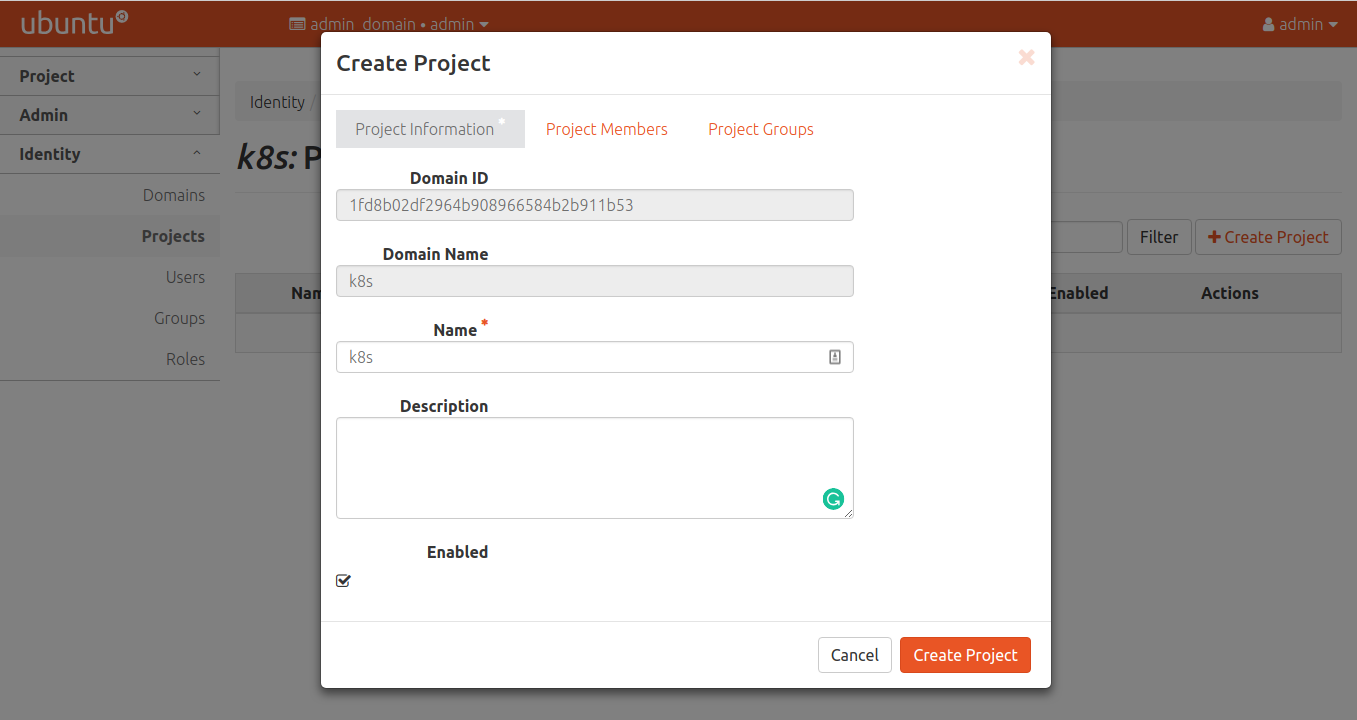
As with the roles, the project name must match the value in the
keystone-policy configuration option on the kubernetes-master charm.
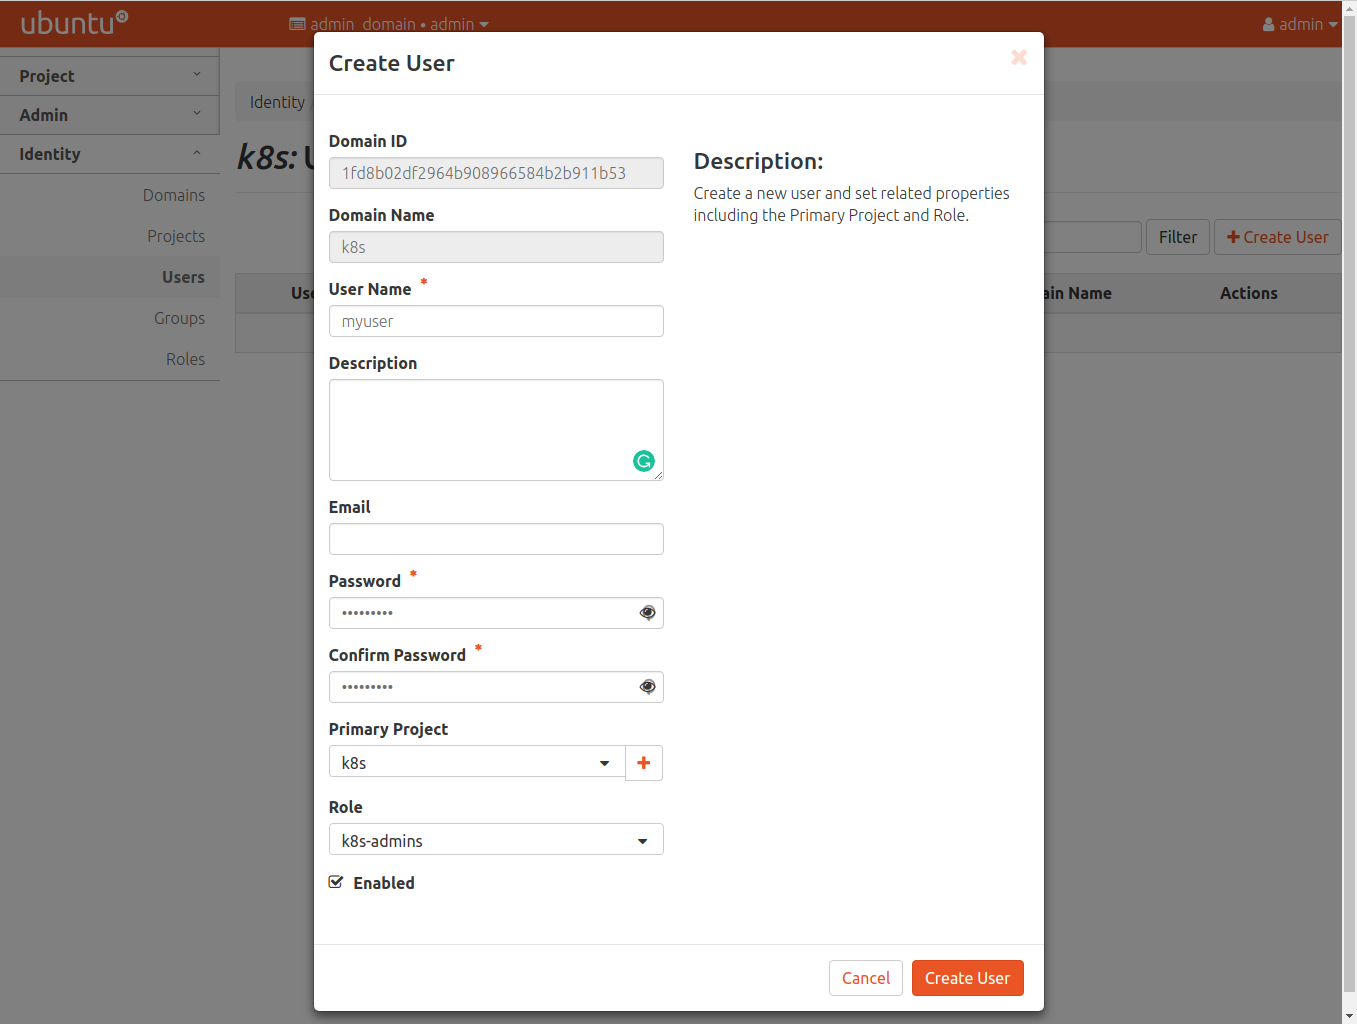
Create a user for Kubernetes
Now ensure the user is added to the project created above.
Using kubectl with Keystone
At this point, Keystone is set up and we have a domain, project, and user
created in Keystone. With the updated config file copied above in
~/.kube/config, we can use kubectl to authenticate with the api server
via a token from Keystone. The client-keystone-auth snap will automate
retrieving a token for us using the environment variables common to
OpenStack such as OS_USERNAME. These environment variables are exported in
the kube-keystone.sh script we downloaded earlier. To use it, update the
variables in kube-keystone.sh to match valid user credentials. Pay
special attention to the OS_AUTH_URL variable and ensure it is using an
IP address that is reachable from the client. Source that file into
your environment with source ./kube-keystone.sh. Any credentials that
are not supplied via environment variable are queried at run-time for
each invocation of kubectl.
Using Keystone with the kubernetes-dashboard
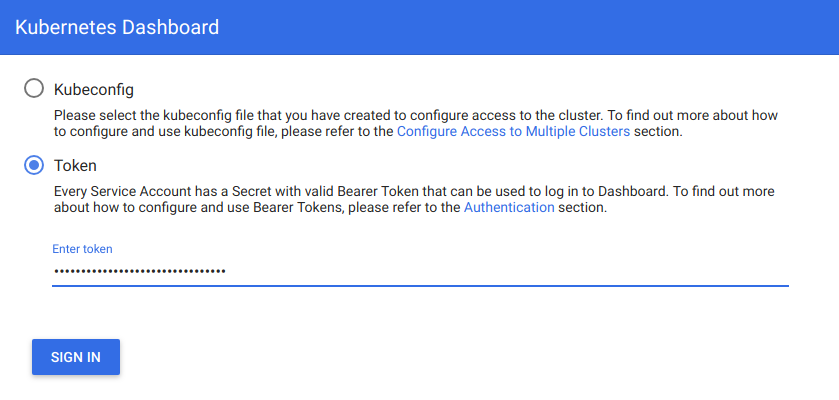
When using Keystone with Kubernetes, the Kubernetes dashboard is
updated by the charms to use token authentication. This means that a token
from Keystone is required to log in to the Kubernetes dashboard. There is
currently no way to automate this, but the kube-keystone.sh file includes
a function called get_keystone_token, which uses the OS_ environment
variables in order to retrieve a token from Keystone.
source ~/bin/kube-keystone.sh
Function get_keystone_token created. Type get_keystone_token in order to
generate a login token for the Kubernetes dashboard.
Enter the command…
get_keystone_token
…and a token will be generated:
ccf9b218845f4d67835f8c6a7c2d1cd4
This token can then be used to log in to the Kubernetes dashboard.
LDAP via Keystone
Keystone has the ability to use LDAP for authentication. The Keystone charm is related to the Keystone-LDAP subordinate charm in order to support LDAP.
juju deploy keystone-ldap
juju add-relation keystone-ldap keystone
Now you need to add configuration to point to the LDAP server. For example:
juju config keystone-ldap ldap-server="ldap://10.10.10.10/" \
            ldap-user="cn=admin,dc=test,dc=com" \
            ldap-password="password" \
            ldap-suffix="dc=test,dc=com"
By default, the name of the application (‘keystone-ldap’) is the name of the domain for which a domain specific configuration will be configured; you can change this using the domain-name option:
juju config keystone-ldap domain-name="myorganisationname"
The Keystone charm will automatically create a domain to support the backend once deployed.
For a more detailed explanation of the configuration and other options, please see the documentation for the ldap-keystone charm
Authorisation
By default, Charmed Kubernetes will setup only authentication with Keystone. This allows the use of other methods such as RBAC for authorisation but using Keystone for authentication: usernames will come from Keystone, but what they can do in the cluster is controlled by another system.
In order to enable authorization feature in Charmed Kubernetes one should change the default config of the charm and switch to RBAC authorization mode as follows:
juju config kubernetes-master authorization-mode="Node,RBAC"
Charmed Kubernetes can also use Keystone for authorisation as follows:
juju config kubernetes-master enable-keystone-authorization=true
When authorisation is enabled, the default policy defined in the configuration will be used. Optionally, A custom policy can be applied by running:
juju config kubernetes-master keystone-policy="$(cat policy.yaml)"
Custom Certificate Authority
When using a custom certificate authority attached to Keystone, some additional configuration is required.
- Add CA to client machines that will run
kubectl.
sudo cp custom_ca.crt /usr/local/share/ca-certificates
sudo update-ca-certificates
- Add CA to the kubernetes-master configuration
juju config kubernetes-master keystone-ssl-ca="$(base64 custom_ca.crt)"
Troubleshooting
As with any application configuration, it is easy to make simple mistakes when entering different values or editing config files. If you are having problems, please read the troubleshooting guide for specific tips and information on configuring Keystone/LDAP.
We appreciate your feedback on the documentation. You can edit this page or file a bug here.
